Recording & Mixing M/S Tracks With the bx_digital V2 EQ Plug-In
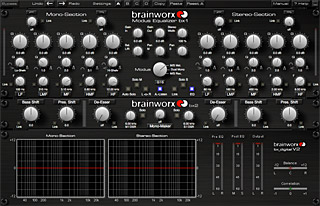
In this article, Brainworx’s lead developer Dirk Ulrich will walk you through how to record and EQ a Mid-Side (M/S) recording session using the Brainworx® bx_digital V2 EQ Plug-In. For a basic overview of how to set up your microphones for Mid-Side recording, check out UA’s Studio Basics article: Mid-Side (M/S) Mic Recording Basics.
To follow along, make sure to boot up the demo of the bx_digital V2 EQ, download the following sample session audio files and presets, and import them into your favorite DAW.
Click here for M/S Recording Demo Session Download [404 MB]
Setting Up Your Microphones
Recording and mixing instruments and vocals using the Mid-Side (M/S) technique is one of the secret weapons that professional audio engineers and producers use when they want to capture a performance in a way described by most listeners as, “natural-sounding,” “wide,” and “big.”
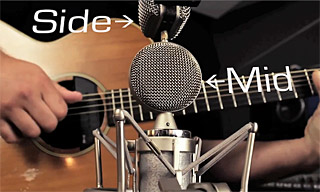
M/S recordings give you a very mono-compatible stereo sound, and with the bx_digital V2 EQ Plug-In, you can record Mid and Side tracks individually, and keep total control over your stereo information until the final stage of production.
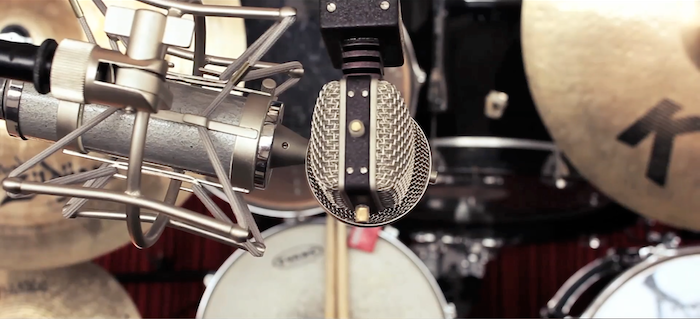
For drum recordings, you will usually place the Mid and Side mics above the drummer’s head, with an additional bass drum mic placed in a traditional manner. The bass drum mic can be thought of as a second Mid microphone. No snare or tom mics are needed, but if desired, this basic three-mic setup can be extended with more individual mics for snare, toms, or cymbals.
Similar setups can be used for grand piano, strings, choirs, and even solo vocals. You will be amazed how big and natural an individual voice will sound recorded this way!
When recording your sources, make sure to record all microphones on individual mono tracks.
The Demo Session – “Mein Traum”
We used the M/S recording technique on “Mein Traum,” recording by my German rock band, Giftig (www.giftig.org). It was recorded in Brainworx’s Neve-equipped studio (www.brainworx-studio.de).
To follow along with our M/S recording demo session with the bx_digital V2 EQ, please make sure to download the demo session here, which includes audio files and plug-in settings. Simply create a blank session in the DAW of your choice and import the files. Or, if you have Pro Tools, a session file is included in the download.
Setting Up Your DAW for M/S Mixing
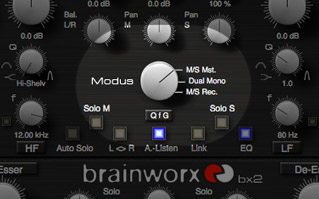
When doing M/S recording into your DAW, you would normally have to route the Mid channel to Left and Right outputs, then route the Side channel to the Left channel, copy it to the Right channel, phase reverse the second ('right') Side channel, and then mix these three channels together. Additionally, you would need to EQ both Side channels identically throughout your mixing. Confusing, right?
Luckily, with the “M/S Recording Mode” in the bx_digital V2, the Mid and Side channels are internally consolidated to a stereo L/R signal with no extra work needed.
In this session, you will have five groups of individual stereo signals – drums, guitar, vocals, bass, and the main mix. We will create them by routing individually-recorded mono tracks into four different subgroups (also known stereo aux inputs, or busses, in some hosts).
First, import each audio file onto its own separate audio track in your DAW. Each audio file will denote either “Pan Left” or “Pan Right.” Pan the Side tracks 100% to the right, and pan the Mid tracks 100% to the left. (Note: The only exception to this is the “D.I. Bass” track. The bass was recorded using a Direct Input, not a microphone, so it will just go in the final mix with no M/S processing.)
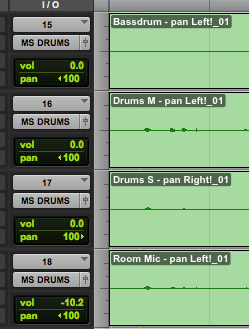
plus one mono room channel.
Now, create three stereo subgroups. Make sure all the vocal audio tracks are routed to a Vocal subgroup, the guitar tracks to a Guitar subgroup, and the drums and room mic to a Drums subgroup. Route all three of these subgroups, plus the DI bass track, to a final Master bus.
Then, route the Mid-recorded tracks into the left channel of your stereo subgroup, so the signals appear in the left-hand meter of the bx_digital V2 EQ (in the labeled “Mono Section”). Route the Side-recorded tracks into the right channel of your stereo subgroup, so the signal appears in the right-hand meter section of the EQ, (in the labeled “Stereo Section”).
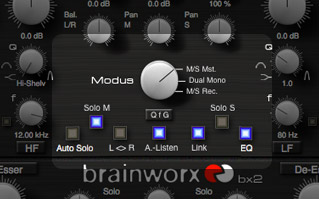
Next, insert the stereo version of the bx_digital V2 EQ into each subgroup. Once you do this, make sure to switch to “M/S Recording Mode” using the dial in the center of the plug-in. The final master bus should be switched to “M/S Mastering Mode.” These settings are useful for any M/S recording project with the bx_digital EQ.
For our M/S Recording demo session, load the included presets for each subgroup. For example, load the “GIFTIG Guitar Group.fxp” preset for the guitar subgroup.
If you now switch between the different modes of the Brainworx bx_digital V2 EQ, you can hear that in “Dual Mono” (regular stereo) and “M/S Mastering Mode,” the Mid channels will play through your left speaker, while the Side channel will play on your right speaker.
Listening to the bx_digital V2 EQ Settings
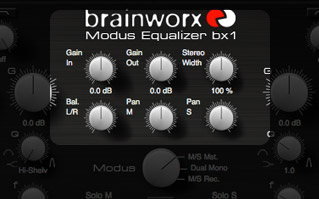
With this configuration in your DAW, we can now look at how the bx_digital V2 EQ lets you to individually sculpt the Mid and Side channels during the mixing process, allowing you to hone in on making the recording sound more natural and enveloping.
Drums
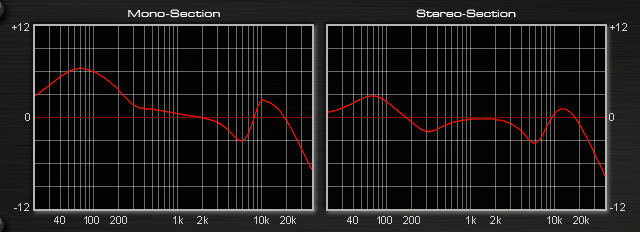
To achieve a big and very natural drum sound, we boosted the low-end in the Mono-Section and added some “air” to the Side channel by boosting the stereo width. We also centered the stereo field of the recording by using the Pan control.
Have you ever thought you could record a full drum kit with only three drum mics and a room mic, then run all the tracks through only one stereo EQ, and compress only the stereo drum bus? It´s a simple setup, but with the bx_digital V2 EQ, it packs quite the punch.
Vocals
The vocals were recorded with a typical closed mic setup, using a standard cardioid microphone for the Mid channel, and a figure-8 mic for the Side channel. This is the same setup we used for the acoustic guitar tracks as well.
In the bx_digital V2 EQ plug-in, mute the Side signal to hear the difference between an M/S vocal recording and a standard mono vocal.
Also, try the “Solo M” and “Solo S” buttons to hear the difference between both tracks.
Acoustic Guitar
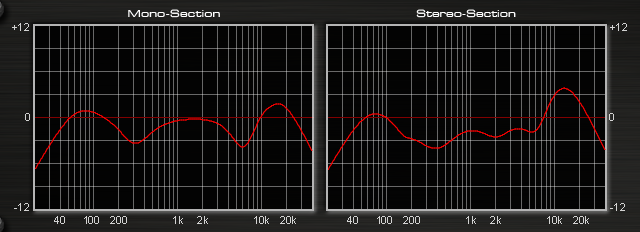
The acoustic guitar was recorded with the same mic setup as the vocals. Mute the Side channel and you will hear how much smaller an acoustic guitar recording sounds with only one standard Cardioid mic, but how wide and lively the Side channel makes the whole performance sound.
Bass
The bass was recorded through a D.I., and was just one mono track, so no M/S processing was needed here.
Final Mix
The master bus (or stereo master) also runs through a bx_digital V2 EQ, but this one works in “M/S Mastering Mode”, which is the mode for mixing and mastering the stereo sum.
Check the “Solo M” and “Solo S” buttons on the full mix.
Additional analog and digital tools were used in the final master of “Mein Traum,” but this session shows a great example of how to get wide, natural-sounding tracks with M/S recording and the bx_digital V2 EQ plug-in.
For more information on the Brainworx bx_digital V2 EQ plug-in, visit: http://www.uaudio.com/store/equalizers/brainworx-bx-digital.html.
— Dirk Ulrich
Read More
Mixing Cold War Kids’ “First” with UAD Plug‑Ins
Lars Stalfors (The Mars Volta, Marnie Stern) breaks down how he and Dann Gallucci (TV On The Radio, Tim Curran) used UAD Powered Plug-Ins on the track “First” from the Cold War Kids’ album, Hold My Home.
Mid/Side Mic Recording Basics
When most people think of stereo recording, the first thing that comes to mind is a matched pair of microphones, arranged in a coincident (XY) pattern. But while XY microphone recording is the most obvious method, it's not the only game in town
Mixing in Stereo: Adding Width and Depth to Your Recordings
Here are some helpful tracking and mixing techniques to create a deep, wide, and clear-sounding stereo recording.


